ASUS AI Suite 3: Features, Download Guide & Common Fixes
ASUS AI Suite 3 is the all-in-one utility suite that has shipped with ASUS motherboards for years, giving you control over overclocking, cooling, power saving, and system monitoring from inside Windows. If you’ve ever wondered what all those ASUS programs on a new build actually do — or you’re fighting an AI Suite 3 installation that won’t cooperate — this guide covers every feature, how to download the right version for your board, and fixes for the most common problems.
What Is ASUS AI Suite 3?
AI Suite 3 is ASUS’s motherboard control software — a dashboard that bundles several tuning utilities into one interface. Instead of rebooting into the UEFI/BIOS to adjust fan curves or overclocks, you do it from Windows with sliders, graphs, and one-click optimization.
Important: AI Suite 3 is motherboard-specific. There is no single universal download — you get the version built for your exact motherboard model from that board’s support page. Versions you’ll encounter include 3.00.13 and 2.00.15, with package sizes typically ranging from ~150MB to ~230MB depending on the board and included components.
It’s also a legacy product at this point: ASUS’s newer boards use Armoury Crate instead. AI Suite 3 remains relevant because millions of boards from the Z270/Z370/H370 era and similar generations still depend on it, and it still works on Windows 10.

AI Suite 3 Key Features Explained
5-Way Optimization
The headline feature: one-click, system-wide tuning. 5-Way Optimization runs an automated tuning process that finds stable overclock settings for your CPU, then sets up matching cooling profiles. It bundles the “Dual Intelligent Processors” logic — TPU (TurboV Processing Unit) for performance tuning and EPU (Energy Processing Unit) for power saving — into preset profiles you can switch between (e.g., performance mode vs. power-saving mode).
Fan Xpert (2+ / 4)
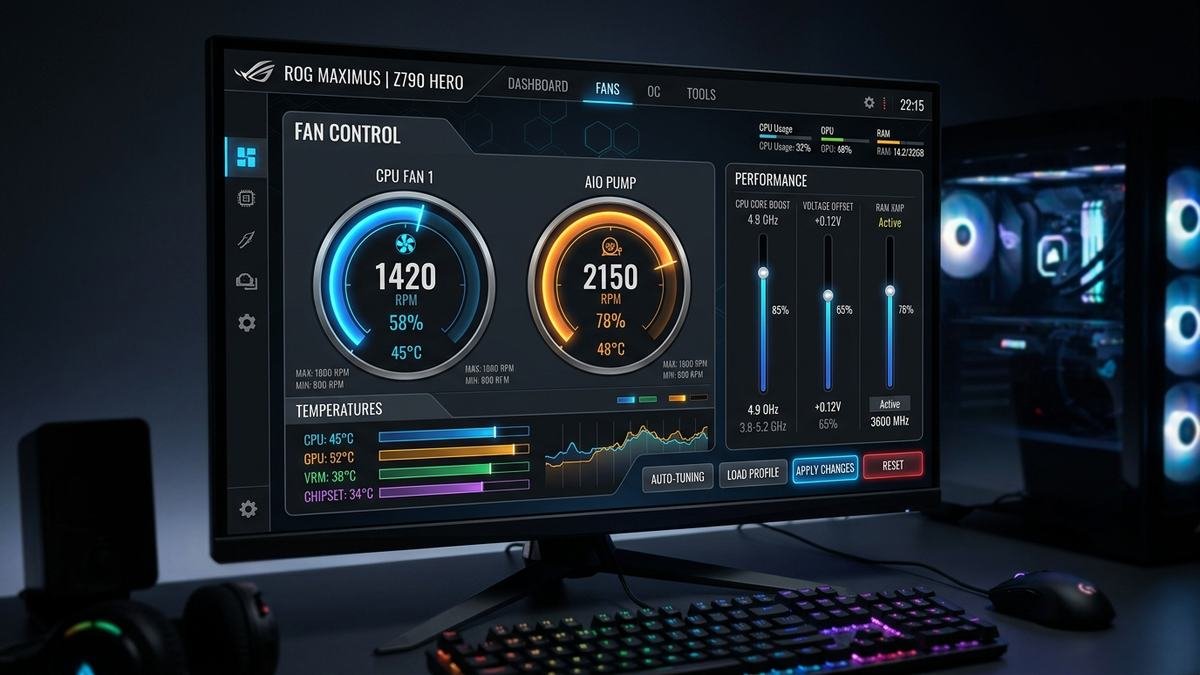
Fan Xpert is the fan-control module, and for many users it’s the entire reason to install AI Suite 3. It auto-detects every fan connected to the motherboard, maps their speed ranges, and lets you build custom fan curves tied to CPU or GPU temperature. Newer board generations ship Fan Xpert 4 (some list “Fan Xpert 4 Core”), older ones Fan Xpert 2+. Either way: this is how you make a loud PC quiet without losing cooling headroom.
Dual Intelligent Processors 5
The TPU + EPU combination mentioned above, presented as a single module. TPU handles overclocking profiles; EPU manages power efficiency — useful for systems left running 24/7 where you want performance on demand but low draw at idle.
EZ Update
Checks for and installs updated ASUS drivers, BIOS versions, and software for your board. Convenient, though many experienced builders prefer updating the BIOS manually from a USB drive.
System Information
A clean readout of your motherboard model, BIOS version, CPU, and memory details — handy when troubleshooting or confirming what you’re running.
USB 3.0 Boost / Network Tools
Depending on board generation, the suite may include USB transfer acceleration utilities and network prioritization tools. These vary by model, so check your board’s specific package contents.
Feature Summary Table
| Module | What It Does | Who Needs It |
|---|---|---|
| 5-Way Optimization | One-click overclock + cooling tuning | Beginners to overclocking |
| Fan Xpert 2+/4 | Custom fan curves, auto fan detection | Anyone wanting a quieter PC |
| Dual Intelligent Processors | TPU performance / EPU power-saving profiles | Performance + efficiency switching |
| EZ Update | Driver/BIOS/software updates | Convenience updaters |
| System Information | Hardware and BIOS readout | Troubleshooting |
| USB/Network utilities | Transfer boost, traffic prioritization | Varies by board |
How to Download AI Suite 3 (The Right Way)
This is where most people go wrong: do not download AI Suite 3 from random driver sites. The correct source is your motherboard’s official support page:
- Go to ASUS Support and enter your exact motherboard model (e.g., PRIME Z370-A, ROG STRIX Z370-G).
- Open the Driver & Utility section for your OS (Windows 10 64-bit for most AI Suite 3-era boards).
- Find AI Suite 3 in the Utilities list and download the version listed for your board.
- Save the ZIP somewhere accessible, extract it, and run the setup file as administrator.
- Read and accept the EULA, then follow the on-screen installer.
Why the official page matters: AI Suite 3 packages differ per board (different Fan Xpert versions, different bundled modules). A package built for a PRIME H370-A may misbehave on a ROG STRIX board. The ~150–230MB download is normal — it’s a big suite.
Windows 11 Compatibility: The Honest Answer
AI Suite 3 was built for the Windows 7/8.1/10 era. On Windows 10, it generally works when you install the version matched to your board. On Windows 11, expect problems: failed installs, modules that won’t open, and fan control that misbehaves are widely reported.
ASUS’s official direction for newer hardware is Armoury Crate, which handles fan control, RGB, and updates on current boards. Practical guidance:
- Windows 10 + supported board: AI Suite 3 is fine — install from your board’s page.
- Windows 11 + older board: try AI Suite 3, but have a fallback plan (BIOS-level fan curves, which always work, or Armoury Crate if your board supports it).
- New ASUS board (2020+): skip AI Suite 3 entirely and use Armoury Crate.
Common AI Suite 3 Problems and Fixes
“AI Suite 3 won’t install / setup fails”
- Run the installer as administrator.
- Uninstall any previous AI Suite version first — leftover components are the #1 cause of failed installs. ASUS provides an AI Suite 3 Cleaner tool for stubborn remnants; use it, reboot, then reinstall.
- Temporarily disable third-party antivirus during installation.
- Make sure you downloaded the package for your exact motherboard model.
“Fan Xpert doesn’t detect my fans”
- Connect fans to motherboard headers (not a separate fan controller) — Fan Xpert can only see what the board sees.
- Run Fan Xpert’s auto-tuning/detection routine before building custom curves.
- Update the chipset drivers from your board’s support page first.
“AI Suite 3 causes high CPU usage or won’t open”
- This is often a conflict with other hardware-control software (RGB tools, other fan controllers). Close or uninstall competing utilities.
- A clean reinstall with the AI Suite 3 Cleaner between attempts resolves most cases.
- On Windows 11, persistent issues usually mean the software has aged out — use BIOS fan control instead.
“EZ Update fails or shows wrong BIOS”
- Update the BIOS manually: download it from your board’s support page, put it on a USB drive, and flash from within the UEFI. It’s more reliable than any Windows-based updater.
General stability tips
- Install AI Suite 3 before other tuning/RGB software to reduce conflicts.
- Don’t run two fan-control programs simultaneously.
- If you only want fan control, you can install just the Fan Xpert component during setup instead of the whole suite.
AI optimization now extends well beyond motherboard utilities — modern AI assistants can help with everything from build planning to troubleshooting. If you’re curious, our ChatGPT vs Copilot comparison and how to use Grok AI guide show what’s possible, and the latest quantum computing breakthroughs hint at where PC hardware itself is heading.
AI Suite 3 vs. Armoury Crate
| AI Suite 3 | Armoury Crate | |
|---|---|---|
| Era | Z170–Z390/H370 generation and similar | Current ASUS boards |
| Fan control | Fan Xpert 2+/4 | Fan Xpert (integrated) |
| Overclocking | 5-Way Optimization | AI Overclocking (on supported boards) |
| RGB | Limited / board-dependent | Full Aura Sync ecosystem |
| Windows 11 | Problematic | Supported |
| Verdict | Keep for older boards on Win 10 | Use for anything current |
5-Way Optimization: How the Auto-Tuning Actually Works
5-Way Optimization sounds like marketing, but the underlying process is a genuine automated tuning routine. When you run it, AI Suite 3 stress-tests your CPU at progressively higher clock speeds, monitoring temperatures and stability at each step, until it finds the highest frequency your specific chip sustains without errors. It then writes those settings as an overclock profile and configures matching fan curves so cooling ramps appropriately under load.
What it adjusts in practice:
- CPU core ratio and voltage — the actual overclock, validated by built-in stress testing
- Fan curves — tied to the new thermal profile so the system stays quiet at idle but cools aggressively under load
- Power limits — EPU/TPU interplay that keeps the overclock within safe power delivery for your board’s VRM
- DRAM timing — on some board generations, memory tuning is included in the routine
Realistic expectations: on a decent chip with adequate cooling, 5-Way Optimization typically lands within 100–200MHz of what a careful manual overclock would achieve — at the cost of slightly more voltage (and heat) than a hand-tuned profile. For beginners it’s excellent. For enthusiasts who enjoy manual tuning, treat it as a starting point, then refine voltage downward yourself.
One caution: run the tuning with your case fully assembled and room at normal temperature — tuning on an open bench in a cold room produces settings that may not be stable in real conditions.

BIOS Fan Curves: The No-Software Alternative
Here’s something worth knowing even if AI Suite 3 works perfectly: everything Fan Xpert does can also be done in the UEFI/BIOS, with zero Windows software. Every ASUS board’s UEFI has a Q-Fan section where you can set per-header fan curves against CPU (and sometimes motherboard or GPU) temperature sources.
Why this matters:
- It always works — no Windows version issues, no software conflicts, no background CPU usage
- It applies before Windows boots — your fans behave correctly from power-on
- It’s immune to AI Suite 3’s Windows 11 problems
The tradeoff is convenience: BIOS curves are set with a clunkier interface and can’t react to GPU temperature on older boards the way Fan Xpert can. The practical setup most builders land on: configure solid baseline curves in BIOS (so the system is safe no matter what), then use Fan Xpert on top for fine-tuning if you’re on a supported Windows version. If AI Suite 3 ever breaks, your BIOS curves keep the system quiet and cool with no action needed.
To set them: reboot into UEFI (usually Delete or F2 during POST), find the Q-Fan or Fan Control section, switch headers from Auto to PWM or DC mode matching your fan type, and drag the curve points. Save and exit. Ten minutes, permanent result.
Building a Quiet PC: Fan Strategy Beyond Software
Since fan control is why most people install AI Suite 3, it’s worth covering the physical side — software can only do so much with bad airflow. A genuinely quiet PC is built in this order:
Mac owners don’t get AI Suite, but the thermal principles are the same — our MacBook overheating guide covers causes and fixes for Apple laptops. MacBook overheating causes and fixes
1. Fan quality first. The bearing type matters more than any curve. Fluid-dynamic bearing (FDB) fans are quieter and longer-lived than sleeve-bearing fans at the same RPM. Replacing two cheap stock case fans with quality FDB units often drops noise more than any software tuning.
2. Fan placement and direction. The classic effective layout: front/bottom intake, rear/top exhaust, creating a clear front-to-back airflow path. More fans aren’t automatically better — two well-placed fans beat four fighting each other. Avoid the common mistake of all-exhaust or all-intake setups that create dead zones.
3. Size and RPM. Larger fans move the same air at lower RPM — a 140mm fan at 800 RPM is dramatically quieter than a 120mm fan at 1500 RPM moving equivalent air. If your case supports 140mm mounts, use them.
4. Curves with hysteresis. When building curves in Fan Xpert or BIOS, set a flat low-speed zone up to ~50°C, a gentle ramp to ~75°C, and aggressive cooling beyond that. Add hysteresis (a few degrees of delay before ramping down) so fans don’t constantly rev up and down at threshold temperatures — that cycling is more annoying than steady moderate noise.
5. The GPU is usually the loudest part. Motherboard fan control doesn’t touch your graphics card’s fans. If the GPU is the noise source, its own fan curve (via the GPU vendor’s tool) matters more than anything AI Suite 3 does.
6. Dust maintenance. A dust-clogged heatsink forces every fan to work harder. Six-month cleaning intervals keep your carefully tuned curves actually effective.
Get the physical side right and your Fan Xpert curves become fine-tuning rather than rescue work.

Overclocking Safety: Voltage, Thermals, and Stability Testing
Whether you use 5-Way Optimization or tune manually, overclocking is safe when you respect the limits. Here’s the safety framework:
Voltage is the danger, not frequency. Modern CPUs protect themselves against heat (thermal throttling) but sustained excessive voltage degrades silicon over time. Rules of thumb for the AI Suite 3 era (Intel 8th/9th gen): stay under ~1.35V for daily use on ambient cooling, and treat anything above 1.40V as benchmark-only territory. 5-Way Optimization’s auto-tune is generally conservative here, which is why its results run slightly hot — it trades voltage for guaranteed stability.
Thermals: know your ceiling. Keep full-load temperatures under ~85°C for daily use (these chips throttle around 100°C, but running near the throttle point constantly isn’t healthy). If auto-tuning pushes you past 85°C under load, your cooling — not the software — is the limiting factor. Improve the cooler or accept a milder overclock.
Stability testing protocol. After any tuning change:
1. Quick check: 15 minutes of Cinebench or similar all-core load — catches obvious instability fast
2. Medium check: 1–2 hours of Prime95 (non-AVX) or OCCT — catches thermal and voltage issues
3. Real-world check: a week of normal use including gaming — catches the subtle instability synthetic tests miss
A crash during testing is information, not failure — it tells you exactly which setting to back off. Change one variable at a time (frequency first, then voltage), and keep notes. And always have a way back: know how to clear CMOS on your board before you start, so a bad setting never becomes a dead system.
Frequently Asked Questions
Is ASUS AI Suite 3 free?
Yes — it’s bundled free with supported ASUS motherboards. Download it from your board’s official ASUS support page; never pay for it.
Where do I download AI Suite 3?
From ASUS Support: enter your exact motherboard model, open Driver & Utility, and download the AI Suite 3 package listed for your board. Avoid third-party driver sites.
Does AI Suite 3 work on Windows 11?
Unreliably. It was designed for Windows 7/8.1/10. Many users report install failures and broken modules on Windows 11. For newer boards, use Armoury Crate; for older boards on Windows 11, BIOS-level fan curves are the dependable fallback.
What is Fan Xpert?
Fan Xpert is AI Suite 3’s fan-control module. It detects all motherboard-connected fans and lets you create custom speed curves based on CPU/GPU temperature — the main reason most people install the suite.
How do I completely uninstall AI Suite 3?
Use Windows’ Apps settings first, then run ASUS’s AI Suite 3 Cleaner tool to remove leftovers, and reboot before reinstalling. Leftover components are the most common cause of reinstall failures.
Should I use AI Suite 3 or Armoury Crate?
AI Suite 3 for older boards (Z270/Z370/H370 era) running Windows 10; Armoury Crate for current boards and Windows 11. Don’t run both at once.
The Bottom Line
ASUS AI Suite 3 remains the definitive tuning suite for its generation of motherboards — 5-Way Optimization for easy overclocking and Fan Xpert for genuinely excellent fan control. Download it only from your board’s official ASUS support page, install as administrator, and keep the AI Suite 3 Cleaner handy for the occasional stubborn install. On Windows 11 or current-gen boards, though, it’s time to move on to Armoury Crate or plain BIOS-level control.